This guide describes best practices for viewing Digital Cinema Packages (DCPs) and multimedia files with easyDCP at the Post Production Center (PPC).
Important Info Before Screening Your Exports
Before screening your exports, it’s important to consider the following:
- It can be helpful to prepare different exports for different environments.
For example, a sound mix that takes full advantage of a surround sound theater may not work as well on earbuds.
Even when correctly tailored for a given environment, your exports will always look and sound different in different rooms, using different playback technology. This is normal, even at the highest levels of professional filmmaking.
Rather than putting your energy into achieving that last few percent of technical consistency, it is more effective to focus on ensuring your creative choices will still have the impact you want across different setups.
Always check exhibitor requirements. Different festivals, theaters, etc. may have different needs when it comes to technical specifications. Always prepare your exports according to their requirements.
Viewing a DCP
There are two ways to view a DCP:
Option 1: In the PPC screening rooms using easyDCP software
Option 2: In the Digital Media Library’s (DML) theaters using a DCP server and DCI-compliant projector
- This must be scheduled with the DML at least 2 weeks in advance.
DCP Playback in PPC Screening Rooms
To play a DCP in one of the PPC's screening rooms:
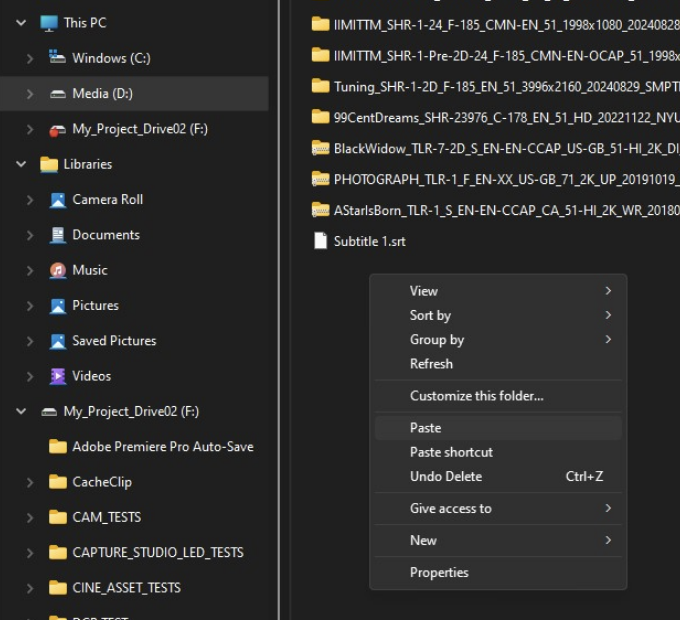
- Open your drive in MacDrive
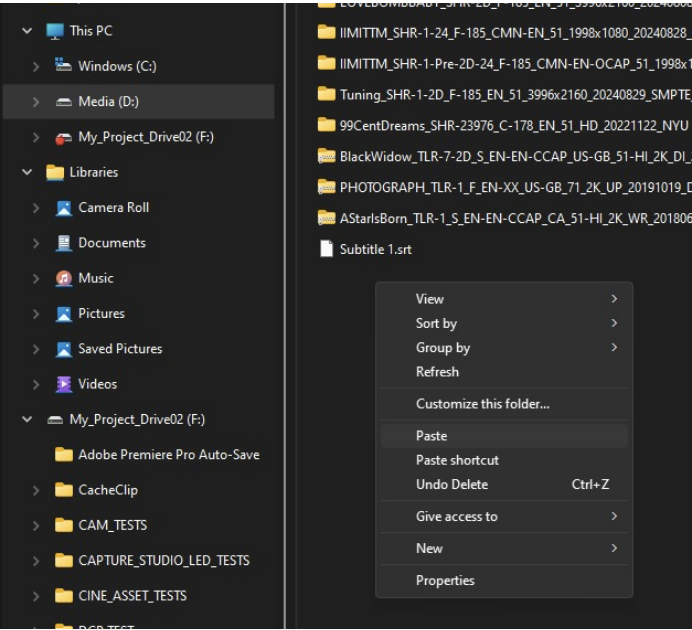
- In the File Explorer window, copy your file and paste it on the Media (D:) drive.
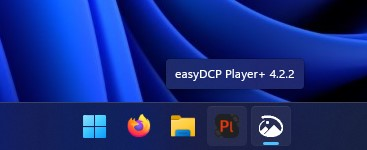
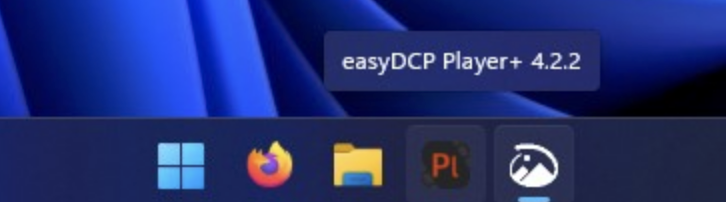
- Launch easyDCP Player+.
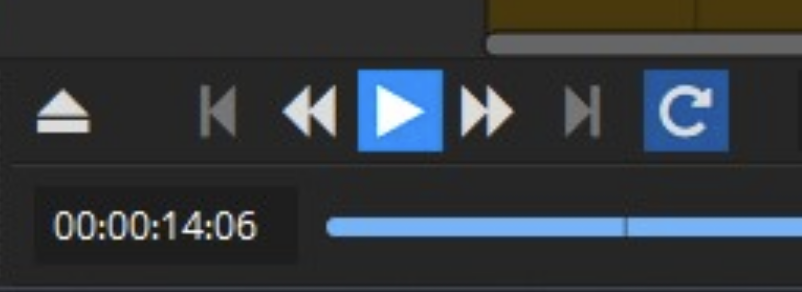
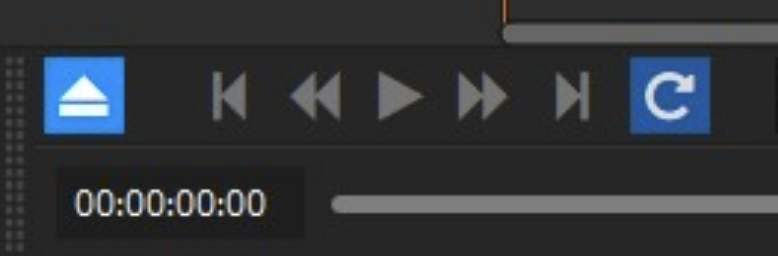
- Click on the button with the Eject icon in the bottom left corner.
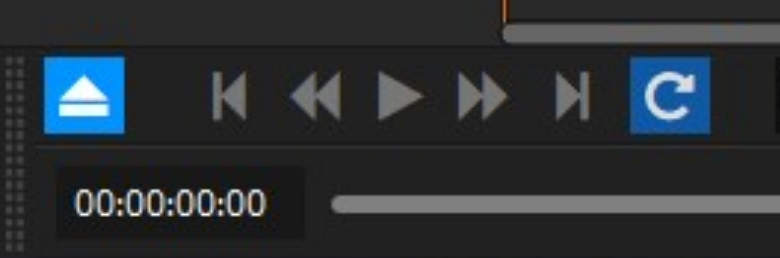
- From the drop down menu, select Open Package.

- In the pop up browser, find your DCP on the media drive, select it, and click Open.
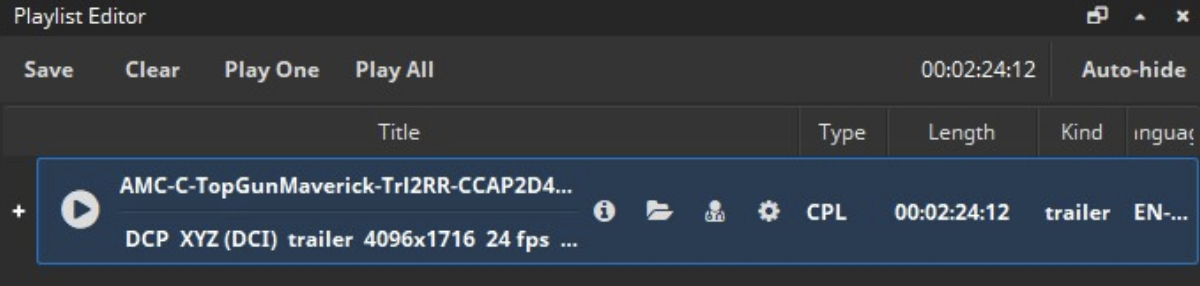
- When the folder opens in the browser, select the ASSETMAP file and click Open.

- Once the file is loaded into the Playlist Editor window on the right of the screen, double click the file to populate the timeline.
- With the file in the timeline, click the Fit to Window button in the bottom menu.

- Toggle captions and subtitles on or off by clicking the Select the Subtitles That Should Be Rendered button in the bottom menu.
- Click the language track you would like to see.
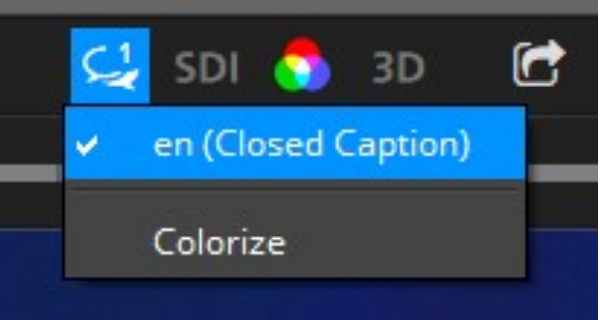
- To distinguish between caption tracks, click the Colorize button.
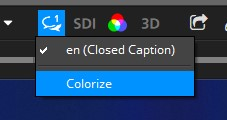
- Click the language track you would like to see.
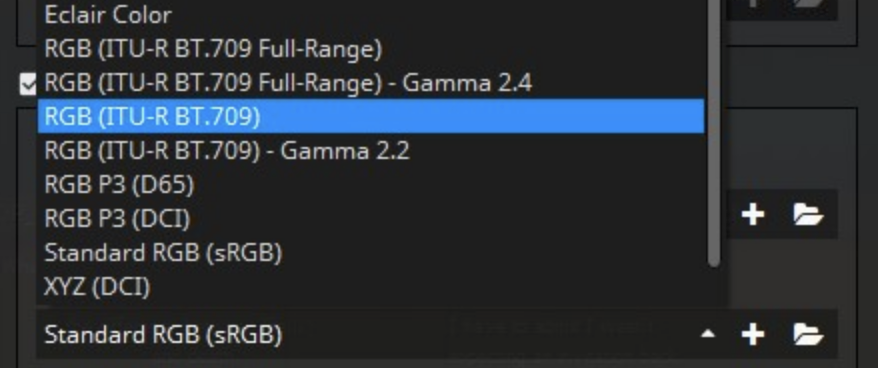
Choose the destination color space by clicking on the Select a Color Transform button and checking the box for Color Spaces.

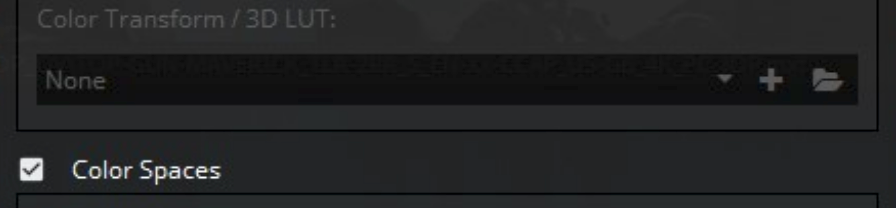
Click Color Transform in the bottom menu bar, and set it to X’Y’Z’ -> R’G’B’ Legal Range (Rec BT.709)
If your color does not immediately appear different on the TV, you may need to repeat this step. On occasion, this setting must be set twice
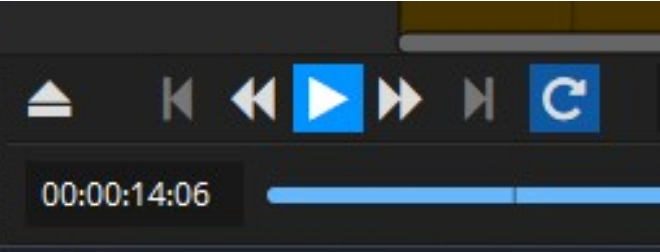
- To play or pause your DCP, click the Play/Pause Playback button.


Viewing a Multimedia File
To play a multimedia file in one of the PPC's screening rooms:
- Open your drive in MacDrive.
- In the File Explorer window, copy your file and past it on the Media (D:) drive.
- Launch easyDCP Player+.
- Click on the button with the Eject icon in the bottom left corner.
- From the drop down menu, select Open Video (or Audio) File.

- In the pop up window, click the three dots to the right of the blank field for Video.

- In the pop up browser, find your file on the media drive, select it, and click Open.
- Verify that the correct file displays in the Open Audio and Video File(s) pop up window and click Ok.

- Once the file is loaded into the timeline, click the Fit to Window button in the bottom menu.

Click Color Transform in the bottom menu bar, and set it to X’Y’Z’ -> R’G’B’ Legal Range (Rec BT.709)
If your color does not immediately appear different on the TV, you may need to repeat this step. On occasion, this setting must be set twice.

To play or pause your file, click the Play/Pause Playback button in the bottom left corner of the screen.