This page will help guide you through the process of using the Hyperdeck Capture Cart.
Important Information
- It is crucial that you know which type of tape you have before using the cart.
- The PPC will provide a temporary SD card and reader. You must bring your hard drive to store your media permanently.
Overview of Components
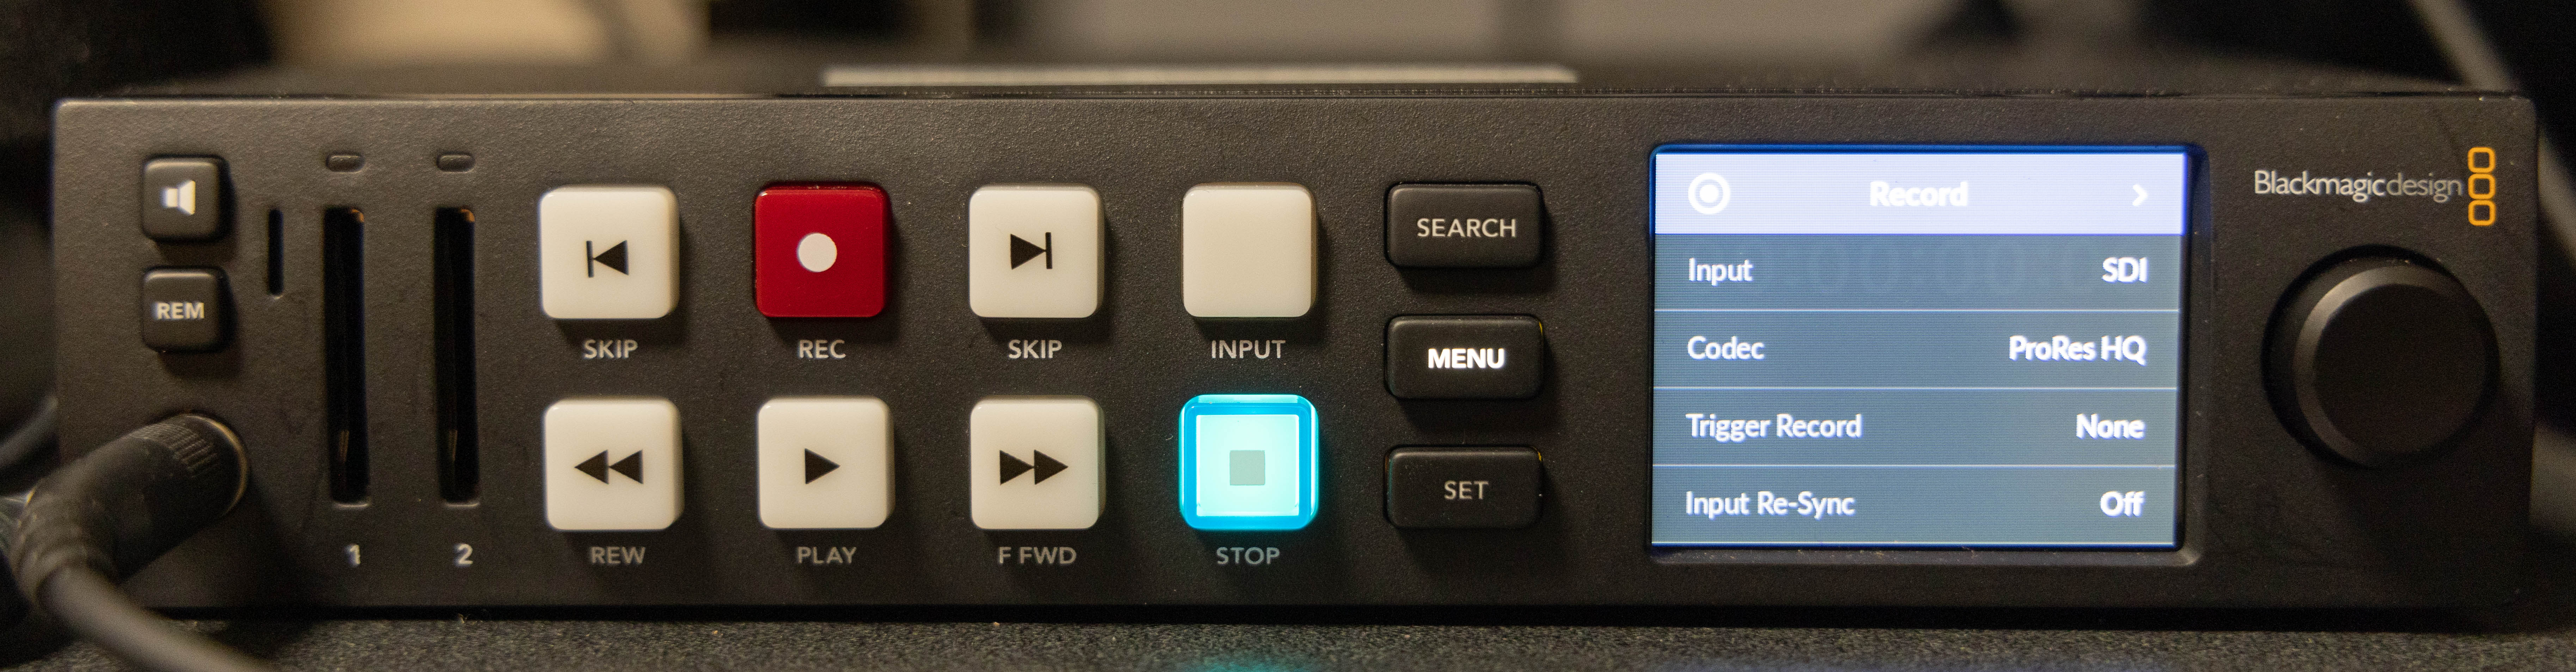
- Black Magic Hyperdeck Card Recorder
- Black Magic MiniConverter
- Converts the s-video signal to SDI for the Hyperdeck
- Flanders 17” SDI Monitor
- Displays video, connected to the Hyperdeck
- Headphones
- Receives audio, connected to the Hyperdeck
- Timebase Corrector
- Stabilizes video signal, either flipped up (Composite) or down (S-video)
- Shinybow Matrix Switcher
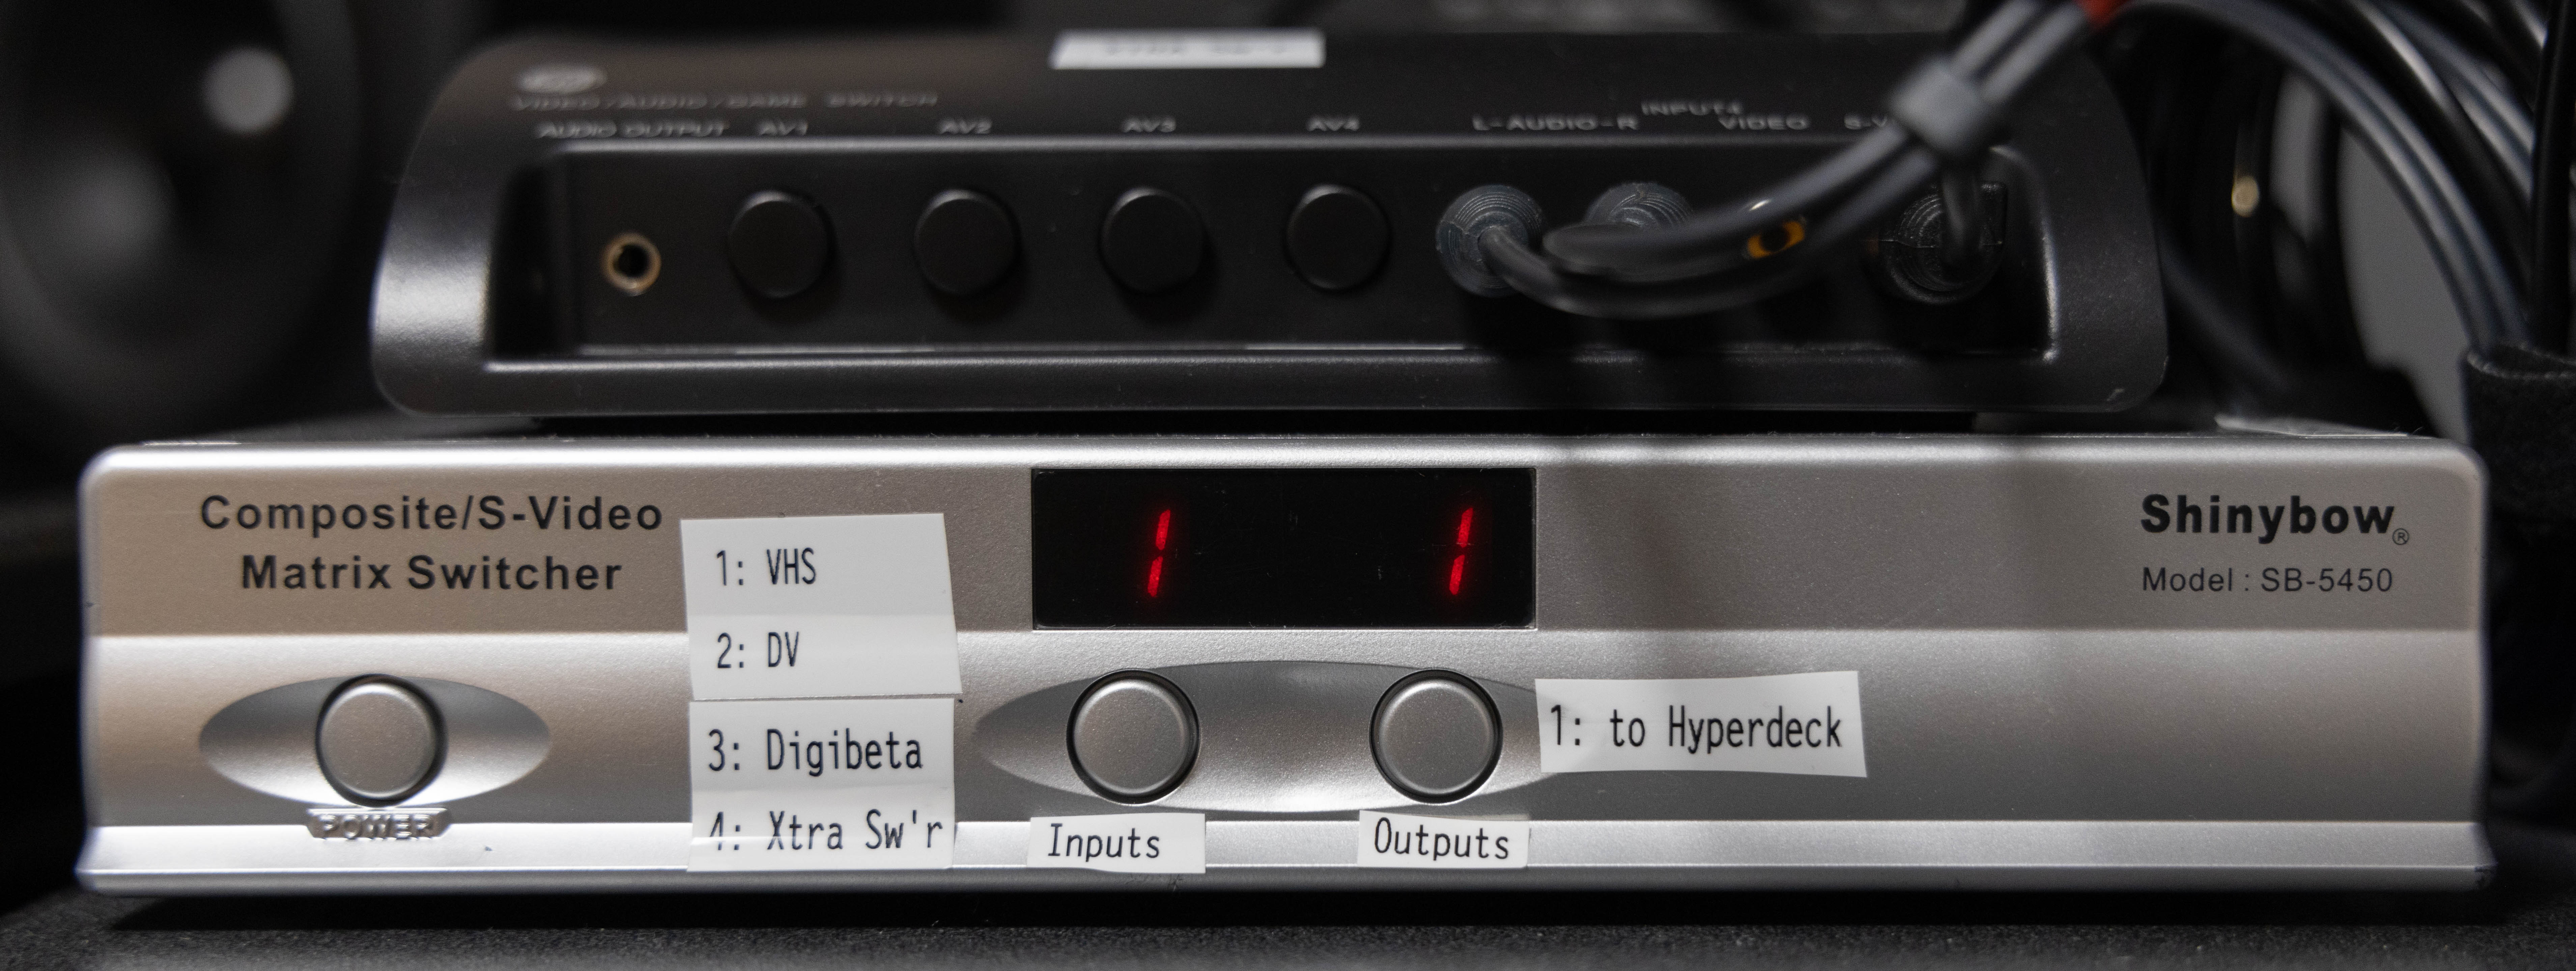
- Use the Input button to select your tape source:
- 1. VHS
- 2. DV
- 3. Digibeta
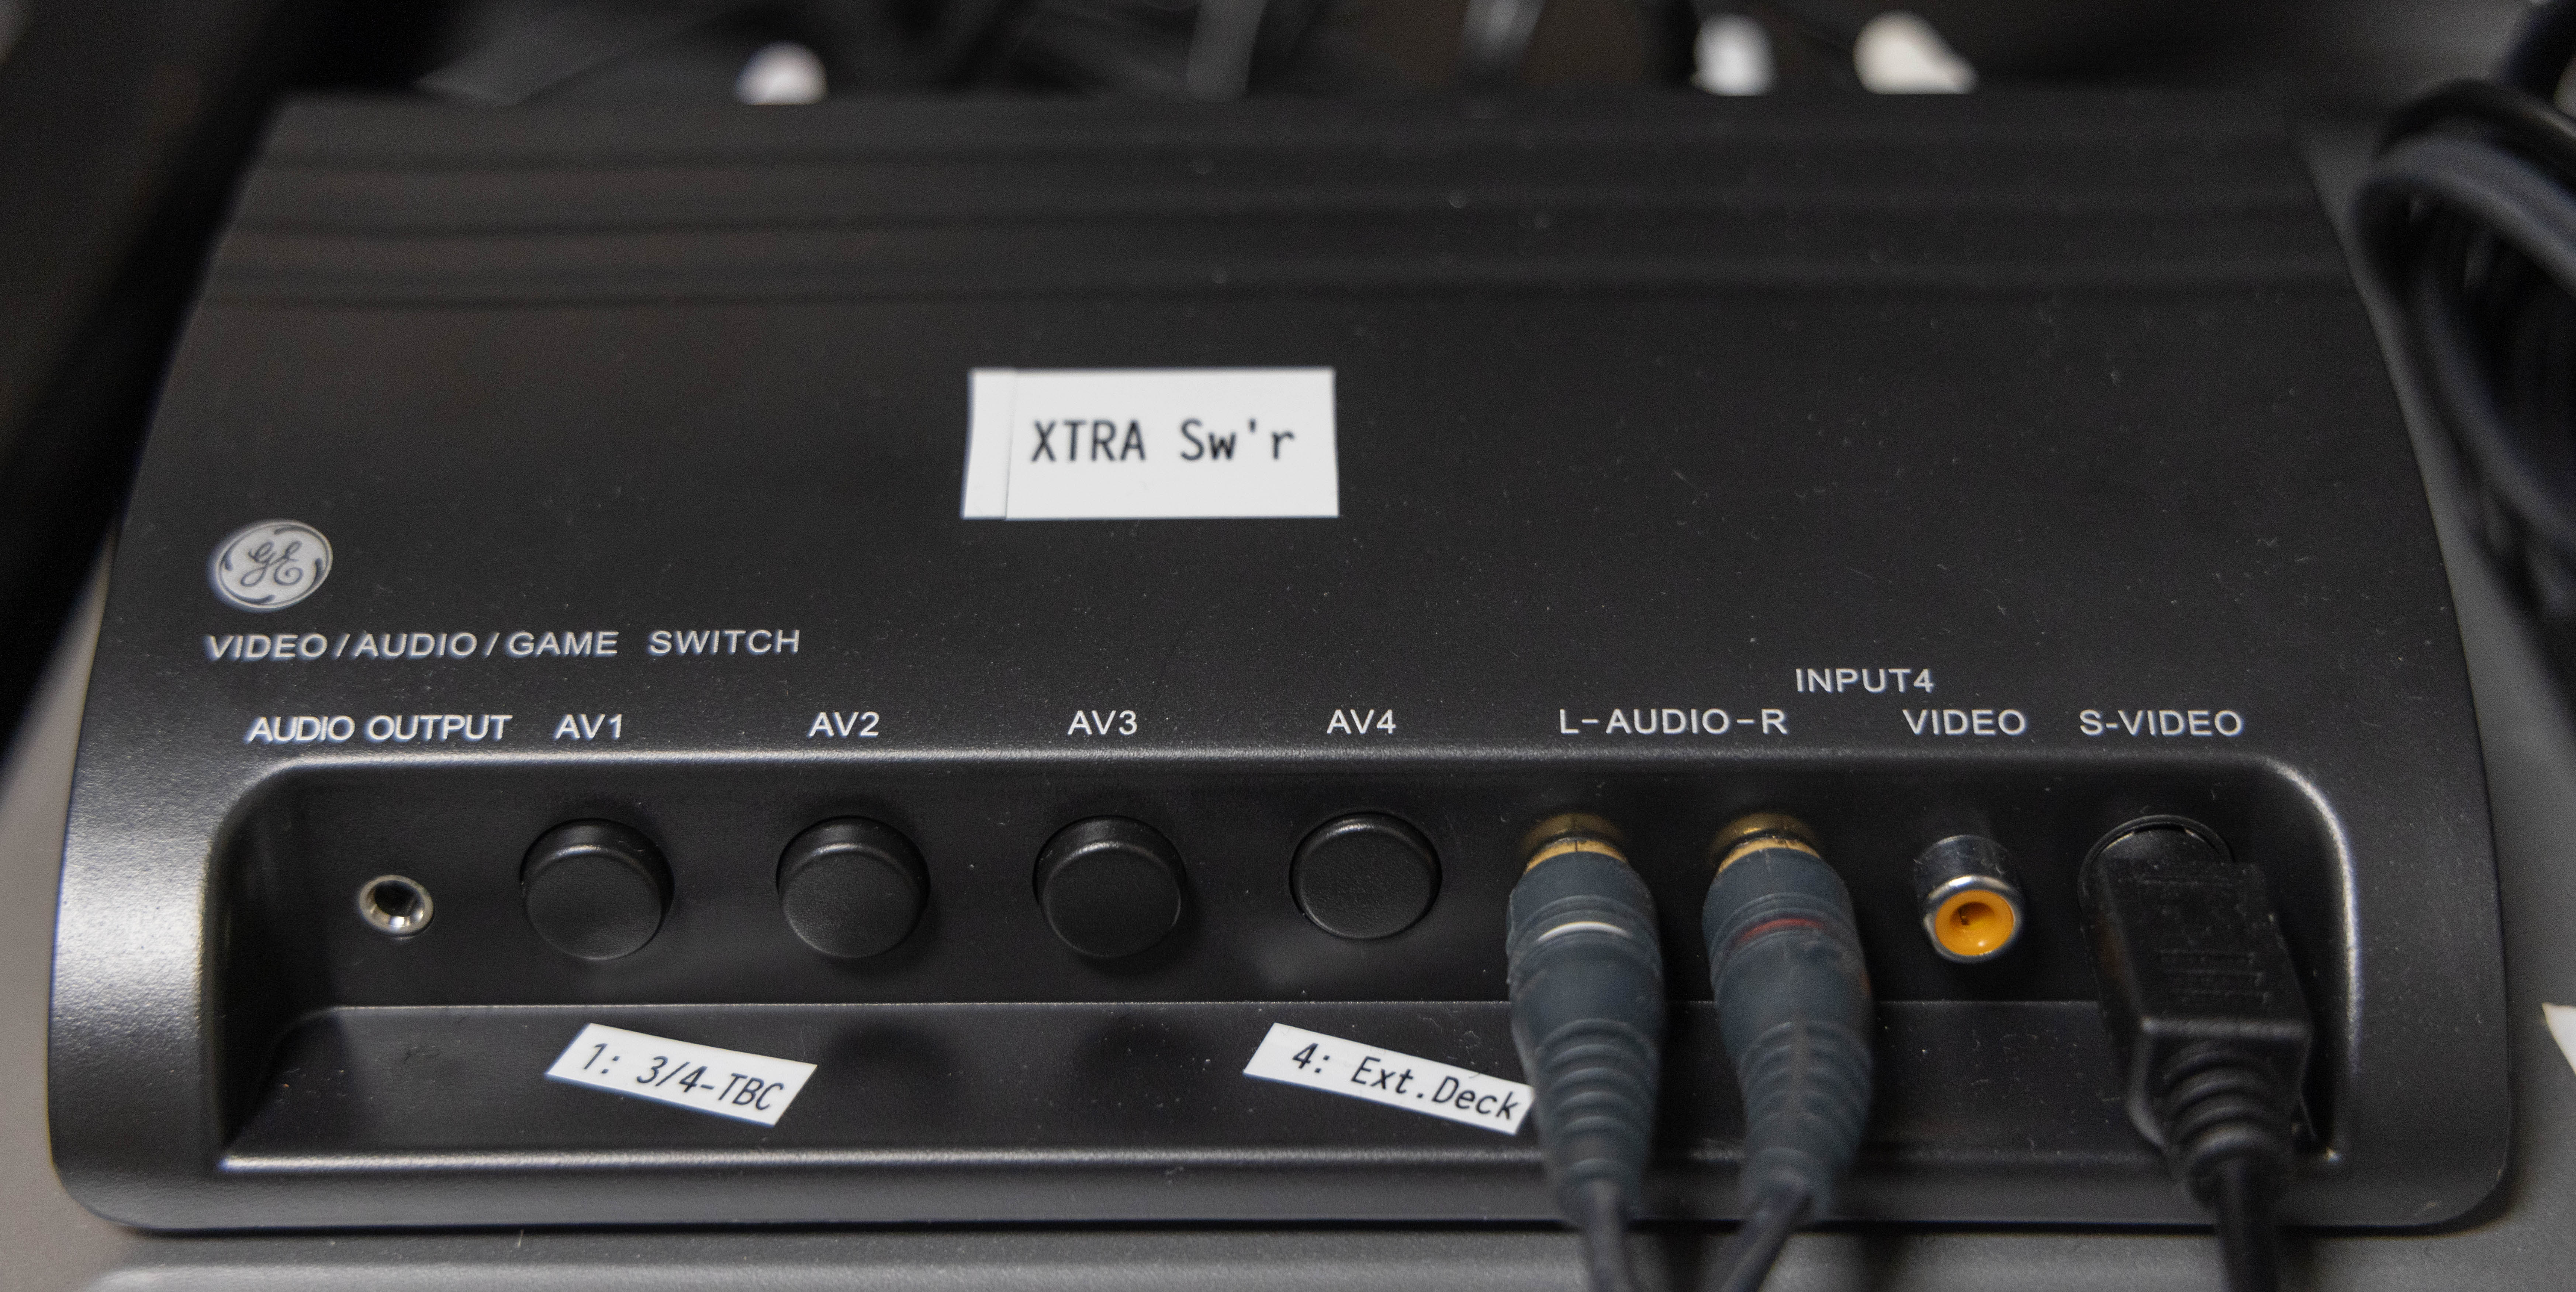
- 4. GE Extra Switcher (for ¾ inch tape or portable tape deck i.e. Hi8)
- Use the Input button to select your tape source:


Using Typical Tape Sources
- Insert an SD card into the Hyperdeck and confirm it is correctly formatted.
- “SD 1” will appear on the Hyperdeck video display.
- Ensure the switch on the time-base corrector is flipped down (S-video).
- Ensure Output on the Shinybow Matrix Switcher is set to 1.
- Set Input on the Shinybow Matrix Switcher to the correct tape source.
- Use Record, Stop, and Play buttons on the Hyperdeck to record, stop recording, and playback.
- Audio levels and video will appear on the Hyperdeck display once the tape begins playing.
- Headphone volume can be controlled by pressing the headphone volume button on the Hyperdeck and turning the adjustment knob.
Connecting ¾ Inch Source Tape
- Connect the VO-9800 to the GE Extra Switcher with the audio cables and s-video cable on the top of the cart.
- Flip the switch on the time-base corrector up (Composite) to convert the video signal from the VO-9800 deck to s-video.
- Once the cables are connected and the time-base is powered on, the Hyperdeck can be used the same way as with typical tape sources.
